After years of building random unfinished prototypes and never documenting them, we decided to do a proper blog post to share the love. We have lots of love to share.
For a few weeks now we’ve been dabbling around with Bluetooth 4.0, otherwise known as Bluetooth Low Energy (BLE). During that process we thought of a few cool applications and decided to go out and build one of those.
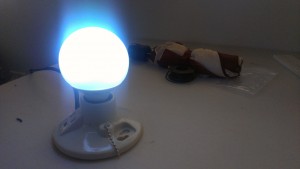
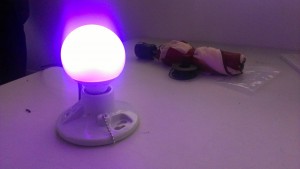
The basic idea is this: You take a lightbulb, and you stuff it with a bluetooth antenna, an arduino and a bunch of RGB LEDs. Then control dimming, color, and anything else you can think of with your (BLE enabled) phone. Good stuff.
Hardware
Since we are making a lightbulb, we have to start somewhere, so we bought a bunch of different light bulbs at Home Depot and ended up picking the biggest one. There are a crap-ton of components so we gonna need the space. Once we had the lightbulb, we emptied out the boring old fluorescent bulb to make space for the imminent awesomeness.


First off, we need a way to power our circuit. Being the badass engineer that you are, we know what you’re thinking, “I should build a transformer circuit that converts mains power to 5V”. Good idea! Except that would take up way too much space, think about it, have you seen the size of those things? Using the power of laziness, we decided to use one of those teeny iPhone chargers. Now we have 5V to power everything, next step.
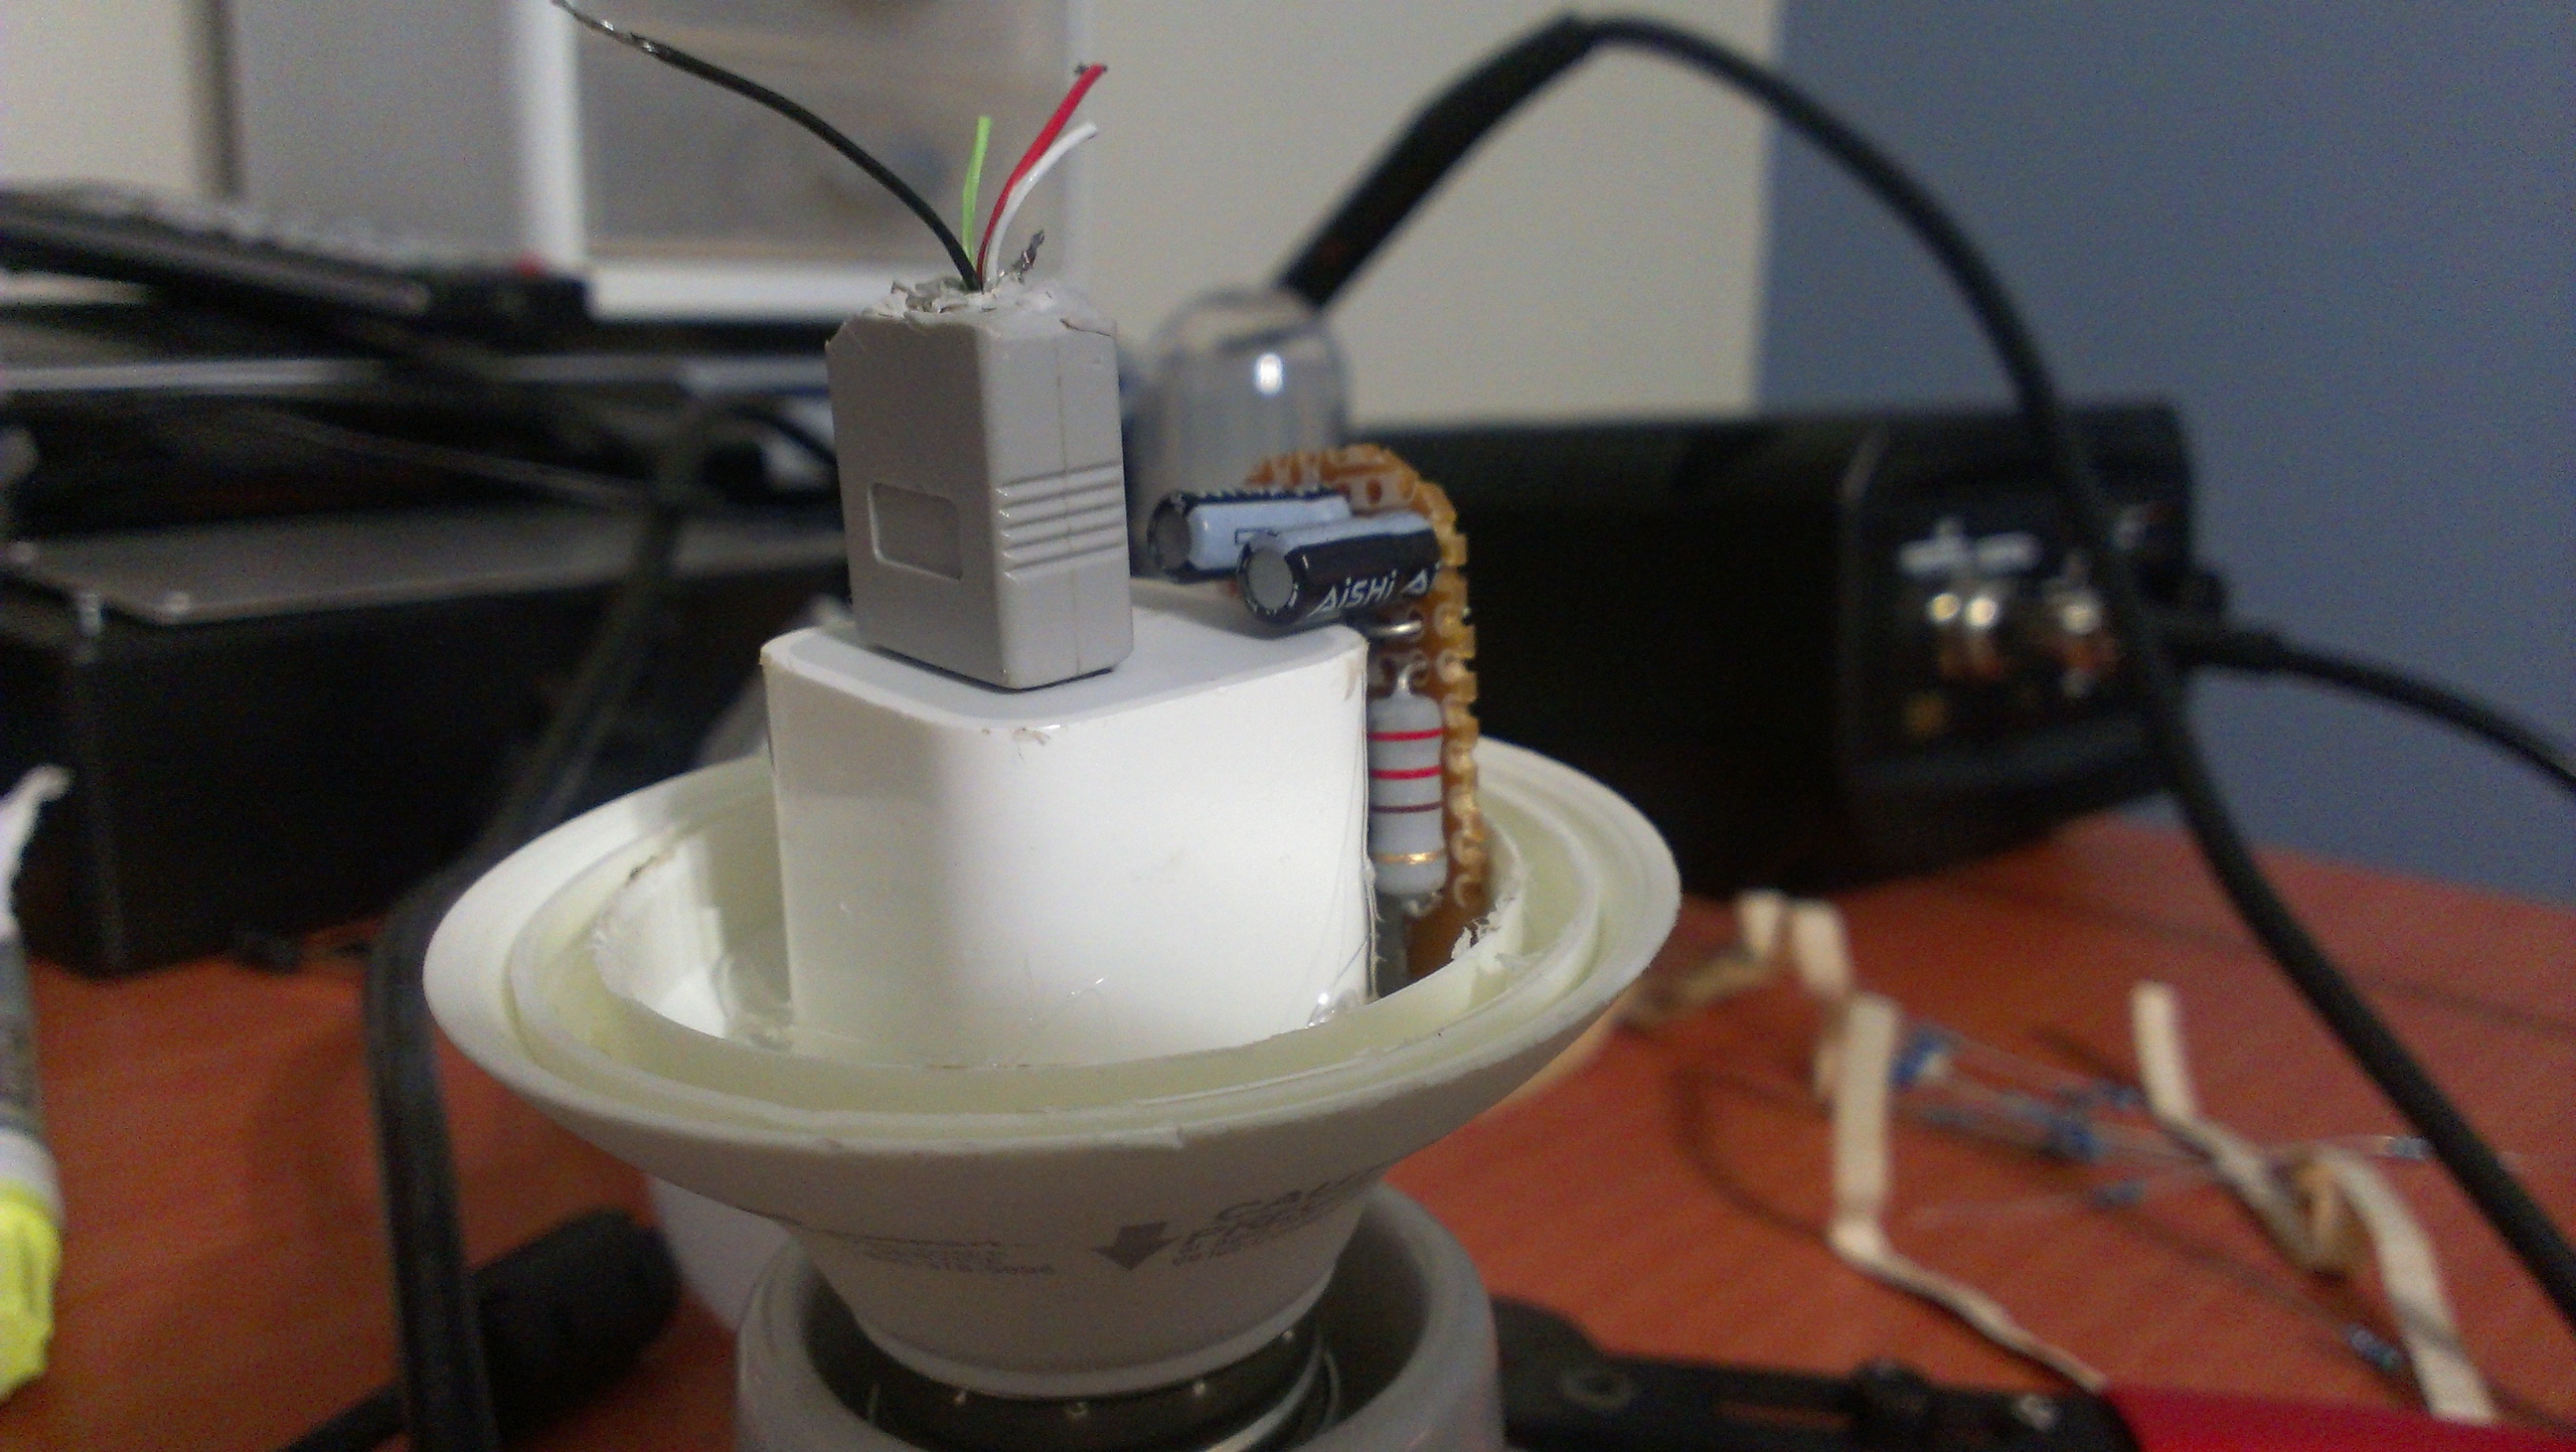
With 5V we can power the Arduino and the LED’s, but not the Bluetooth module, which runs at 3.3V. Again, we know what you’re thinking: “Hey, you have an Arduino Pro Mini, and that has an internal regulator that we could use to power the BT module!”. Well, that’s actually a really good idea, but we are not as crafty as you are so we bought the 5V version of the Pro Mini, instead of the 3.3V. That means we had to make a 5V to 3.3V regulator. Not bad, now we’re even.

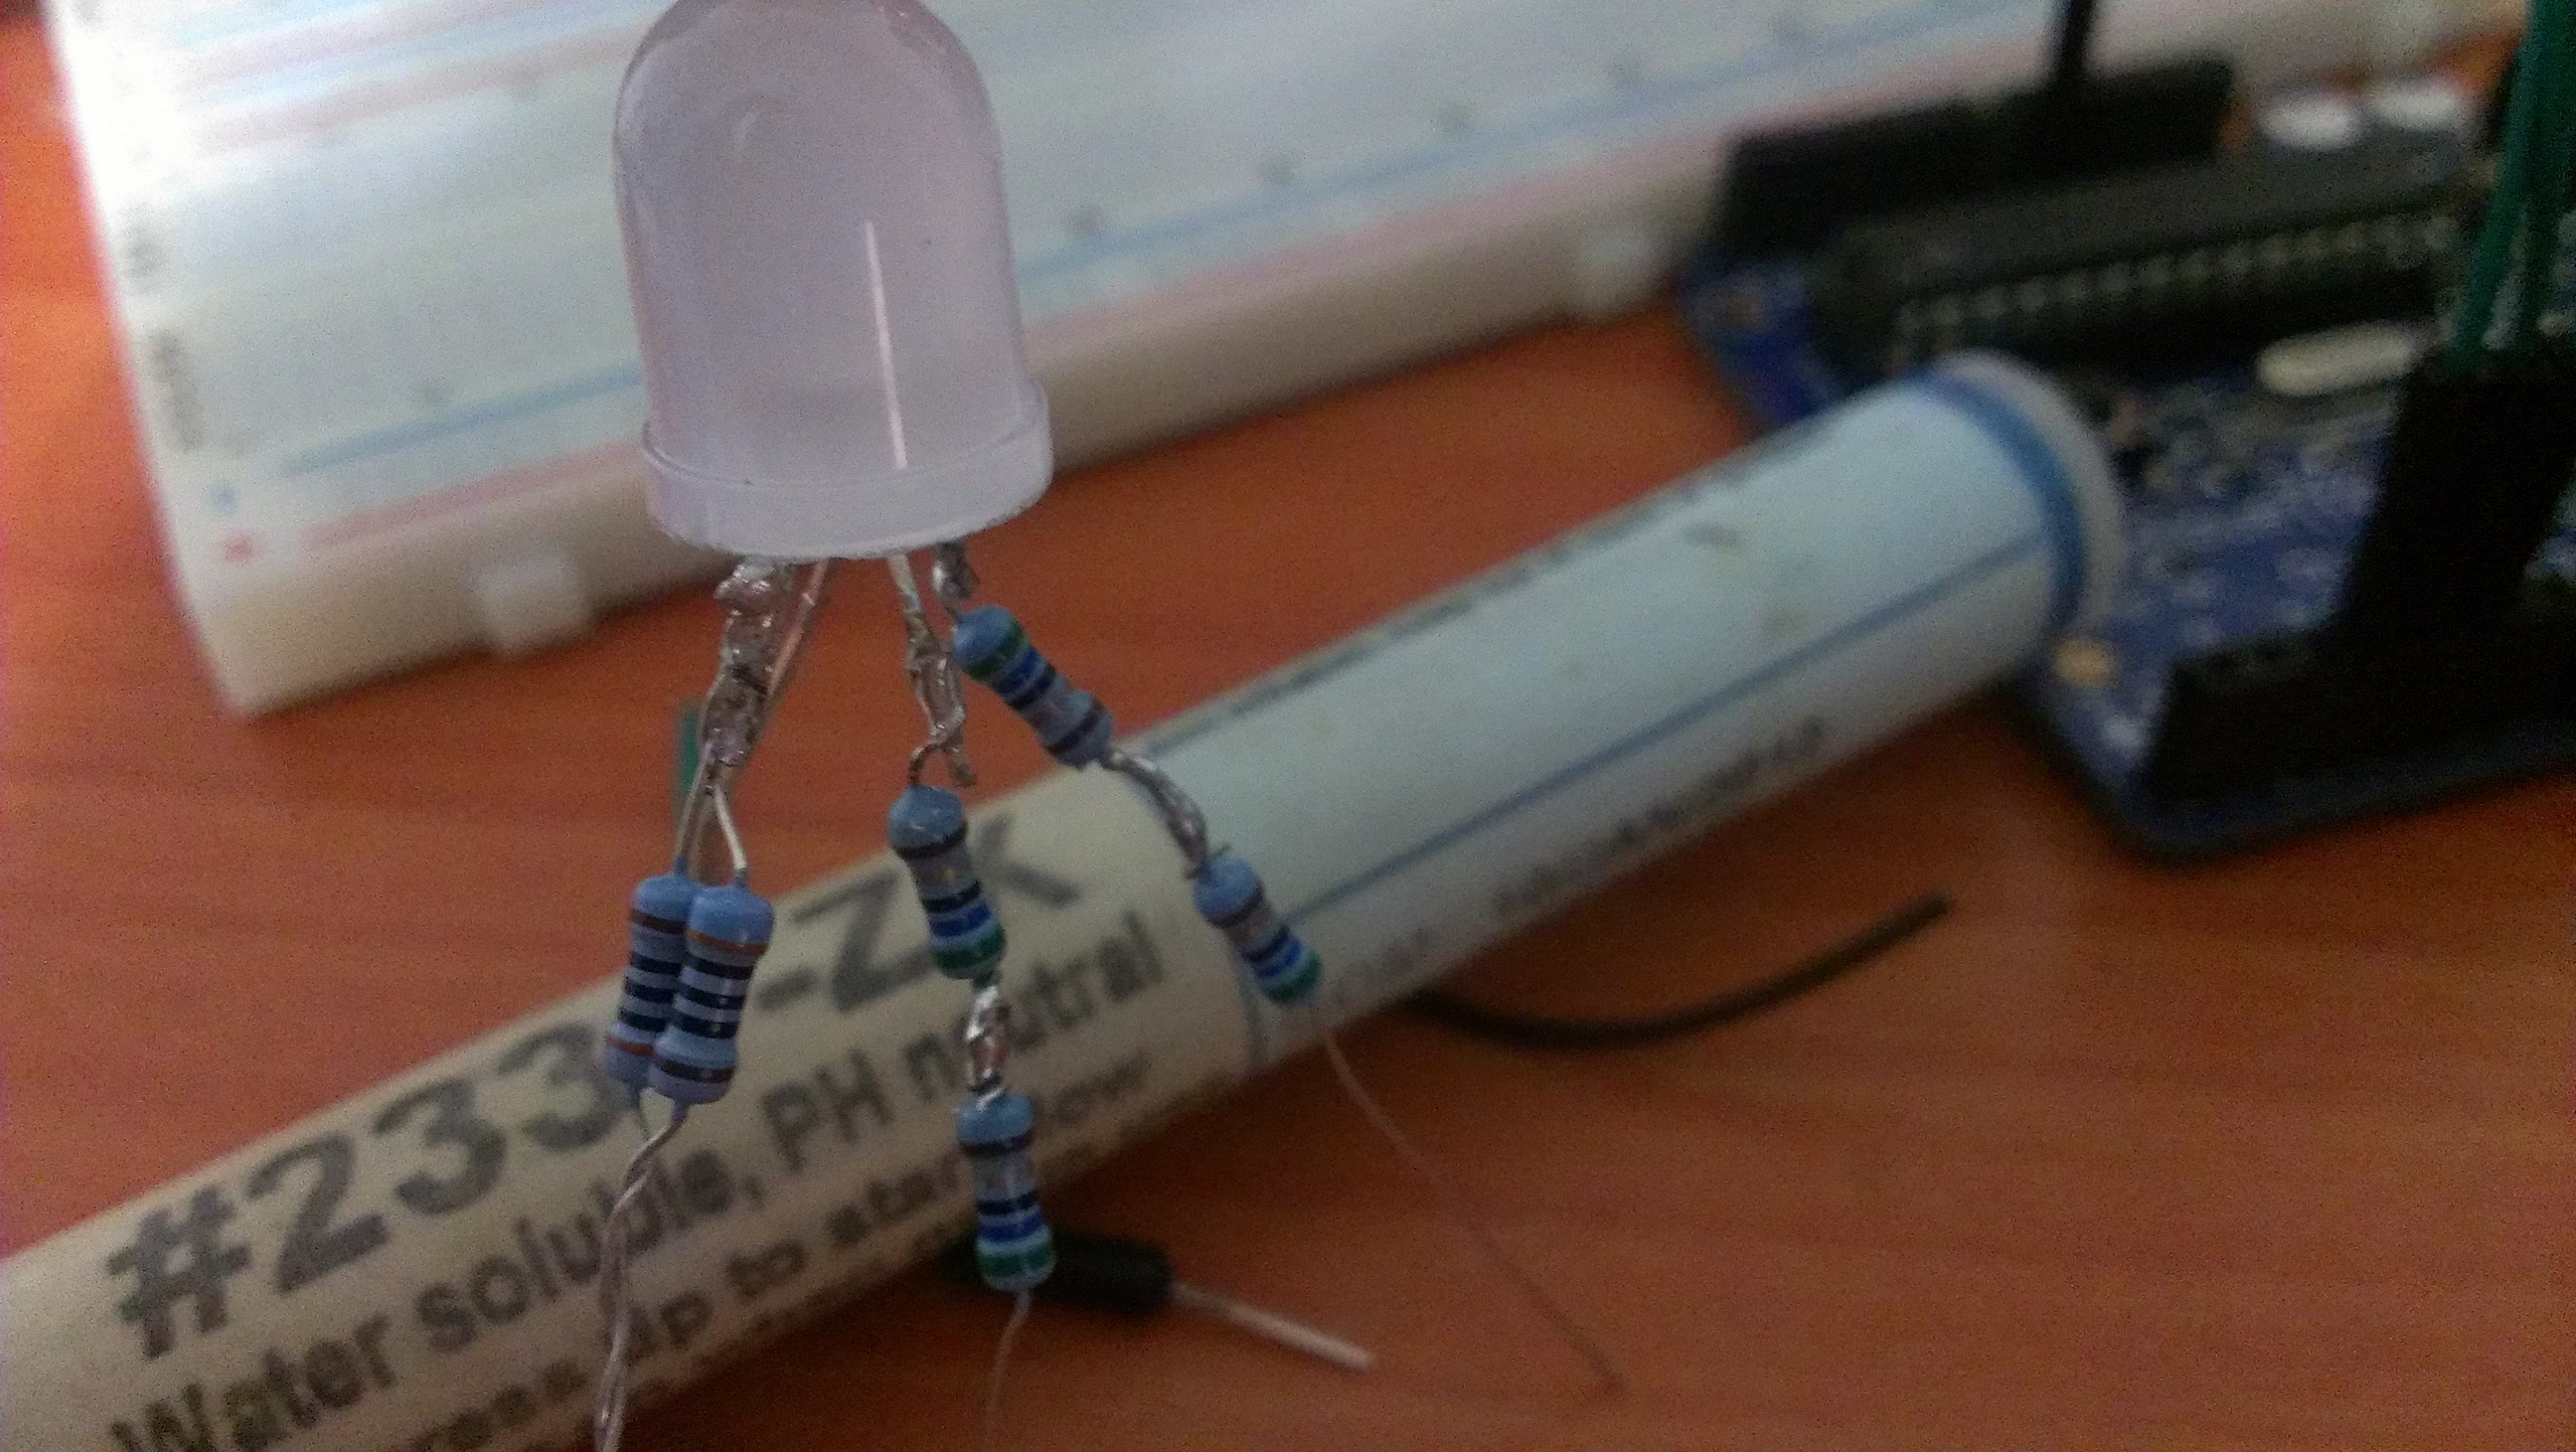
Awesome, now we can power the whole project. Wait, no we can’t, because the Arduino pins are a bunch of wussies who can only drive 40mA. (Someday I’ll design a microcontroller that can drive 1000A per pin. It’ll be the size of a refrigerator, but I’ll be happy.) Now that may sound like a lot but it’s not enough for what we want. RGB LED’s are technically three LED’s all packed inside of one (red,green, and blue). Each of these LED’s has maximum forward current of 20mA, easily managed by the Arduino pins. So what’s the problem? We are planning on putting as many LED’s inside the bulb as we can (We ended up just using 3, don’t judge). So we would need one pin per color per LED. That’s a lot of pins, so we used a transistor to drive each color. That’s 3 pins, for any number of LED’s that we want (if the transistor can drive the current, that is).
Let’s not forget the resistors on those LED’s. We didn’t have a whole lot of resistors lying around so we couldn’t make all the LED’s run with exactly the same forward current. Still, it was close enough.
Red = 17mA Green = 16mA Blue = 18mA
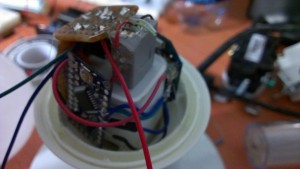
Now it’s just a matter of connecting everything together. And this is how everything looks together, in all it’s hot-glued glory.


Software
Great, all the hardware’s done. Now for the brains of the operation, which is divided in two parts. The Arduino firmware, and the iPhone application. The firmware is pretty straightforward.
Right now, the Arduino isn’t reading serial data from the BLE module, it’s pretty much working as a pass-through for whatever the BLE module says. It reads the value of three of the BLE’s GPIO’s to control each color of the LEDs. In the future, it should read serial commands from the UART and have a big list of awesome things that it’ll do. Naturally.
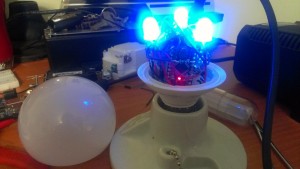
And as you can see, it looks gorgeous.
For the iPhone application, you’ll have to wait for a future post, by our very own Ramón González.
Parts List
Finally, if you want to build your own, here’s a rough list of all the parts, and their prices.
Lightbulb: $10 for two.
This bulb is great for this because it’s pretty big, and easy to open up.
Charger: $5
We used a cheap knockoff sold at a local hardware store. You can use any, as long as it fits inside the lightbulb.
BLE Antenna: $44
Arduino Pro Micro: $10
We used the 5V version, but you’re better off buying the 3.3V one.
LED’s + Miscellany: ~$10
For a grand total of about $80 for the whole thing.
Proven wrong once again, I was certain that only Apple could sell a $100 lightbulb. They could probably run the cost up to $199 though.
What was the rough cost of all of the materials?
You do look like the kind of person who’s generally wrong. So it’s ok.
Moi interensate
This looks great! What bluetooth LE module did you end up using in this project?
We used the BlueRadios module found here:
http://www.digikey.com/product-detail/en/BR-XB-LE4.0-S2A/822-1017-ND/3593638
We’ll be adding the full parts list to the post soon. Thanks!
If you’re finding it tricky to work around the limited current of an Arduino’s pins, you might want to check out these chips:
http://kamuskomponenelektronika.blogspot.ca/2012/12/uln2003.html
They’re pretty widely available from hobby electronics shops, electronics suppliers, etc. and make it really easy to translate an array of low-current digital signals into high-current sinks for LED arrays, lamps, motors, and anything using hundreds of mA’s. I found them really handy when working with power RGB LEDs for building my own remote-controlled lamp. Way cleaner than hacking together a bunch of custom transistor circuits.
What’s the heat buildup in the bulb?
Pretty much zero. We’re only running 3 LED’s so it really doesn’t get hot at all.
It would be nice and cheaper a PoE version.
What was the charger used for? This is powered by the 115v from the light bulb socket correct?
Yep, the charger converts mains power (115V AC) to 5V DC that powers the rest of the circuitry.
Could you give me a link to a charger like that? I can’t find it anywhere. And how exactly did you wire it up? This part is confusing to me, and is keeping me from getting the project started 😉
It’s a regular iPhone charger I had around. The legitimate ones are a bit expensive, but there are imitations that, although not super reliable, will do the job just fine.
The way I wired it is I put a USB cable into the charger and I cut the cable in half, to expose the little cables (where 5V and GND are).
Any update on the software side? I have the same chip and have not been successful in getting it to do anything with UART from an arduino.
Unfortunately, we stopped using that particular BLE chip. We moved on to the BLE112, which we got to work just fine. Now finally we settled with the Nordic nRF8001, which we’re using on our BLE development board, the BLEduino. Check it out on kickstarter, it might be just what you need 🙂
I’m having a hard time getting into the bulbs you mention. Can you give me some tips to get into that bulb? I would really appreciate it.
There’s a bit of paste holding the glass onto the base. I just slowly nudged a flat-head screwdriver around the glass and the base of the lightbulb until it came right off. When you get the bulb to open, you’ll have to fiddle a bit to remove the actual bulb, which will have cables on the bottom that you’ll have to cut. Make sure to leave those cables as long as possible when you cut them and you’ll be fine.
Also, the link I posted is the exact version of the lightbulb I used. Here it is, in case you missed it.
I hope that helps.
Worked great, thanks again.
Great thank you, I’ll give that a try.
I wanted to start a development for using Bluetooth 4.0. I heard about good reviews on Arduino products. I have 2 questions:
a. What Arduino products do i need to buy to start bluetooth development? Can u provide specific models number if possible?
b. I want to build something like HipKey or StickNFind. I have purchased StickNFind. Can i use Arduino to pair/work with HipKey or StickNFind fobs?
c. If the answer is NO with item b above, What recommendation as Bluetooth fobs to work with Arduino? I need something low cost.
You can’t communicate with BLE fobs using Arduino unless you use a master BLE module, which is no easy task for now. If you want to use Arduino + BLE to talk to your phone, for example, we released a development board (called BLEduino) that does just that. You can pre-order it here! Let me know if that helps 🙂